

Instrumentation in a car, the gauges and readouts which give you important information, such as speed, how far you’ve gone, engine temperature, how much fuel is left in the tank, by and large sort of fade into the background when you’re driving a vehicle. They sit there, they do their thing, you look at them on some regular interval. I’ve only ever driven one car where the gauge cluster annoyed me to no end (A Mazda Rx-8, if you’re curious — it was just an ergonomic mess). The point is, one doesn’t tend to pay too much attention to them…until they stop working, then it’s like driving blind.
When I took delivery of this car, it wasn’t completely apparently which bits of instrumentation were working and which were not. Given the short drive (with no breaks and no power steering) from the field, to the trailer and from the trailer to the backyard, I could tell that the speedometer and the tachometer were nominally functional, but sometimes the dash needed a whack to get the tach to spring to life. I could tell, that most of the bulbs were burnt out so it was hard to see much of anything at night. The center LCD display was also dead. Most of the idiot lights and central check module appeared to work. I figured the first thing to do was to replace bulbs and generally check things over.
The procedure to pull the cluster couldn’t be more straight forward.
1) Remove the horn pad (just pull)
2) Remove the nut holding the wheel to the column, and pull the wheel off.
3) Loosen the clamp which hold the Multi-function switch to the column, and slide off.
4) remove two small screws from the cluster, pull it out and unplug 3 electrical connectors.
I knew I was in trouble when, as I completed Step 2 , I was showered with a dozen tiny ball bearings. You’ll note, that “pick up ball bearings and try to insert them into their mangled nylon carrier” is NOT in listed in the procedure above.
Having a suddenly acquired a new side-quest, I started searching the floor and by some miracle, was actually able to find all but 1 of them. Turning my attention to the mangled carrier, I was able to kind of bend it mostly back into shape, and pop the bearings into their spots. This bearing, sits just inside the column housing around the steering shaft, behind the steering wheel, offering support and smooth operation. Without it, there is a disconcerting amount of up/down left/right play in the wheel, along with unhappy metal scraping sounds when the wheel is turned. Thankfully, the bearing carrier seated well in the column. It seated so well, I was unable to remove it again, which make me wonder what kinds of abuse this poor car suffered before it came to me. Regardless, with this intermediate crisis out of the way, I proceeded down the list.
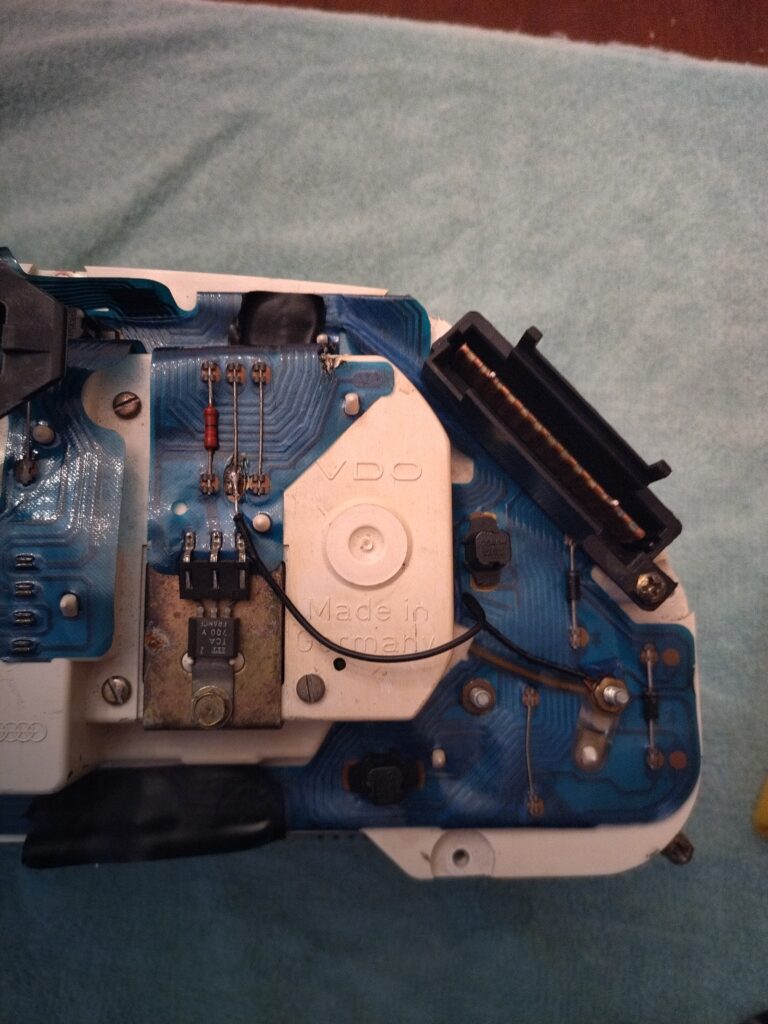
Once the cluster was removed, It was immediately obvious that I’d acquired another side quest. The contacts between the various bulbs and needles and the electrical connectors, consist of very very thin strips of copper, embedded in a fragile plastic sheet. The plastic contact mat was torn in several places, preventing signals from getting to where they needed to be.
Repairing a broken circuit trace is generally a straightforward operation. You can either bridge the trace with solder if it’s a small crack, or run a bodge wire to give a new electrical path. This is a not-uncommon occurrence when working with old computers in general. Unfortunately, given the light plastic nature of the “board”, it would simply melt and shrink when the soldering iron would come near it, so it was VERY challenging to try and bridge the broken the traces, but I persevered and managed to make some repairs which showed that I had restored electrical continuity.
So, with repaired traces and all new light bulbs, I plugged it in, turned the ignition switch to “on” and learned that while the fuel gauge came back to life, the center LCD did not. Bummer. I clicked the lights on to be sure all the new bulbs worked and several bulbs in the cluster EXPLODED.
Sigh. So, I took it apart, cleaned out all the broken glass, and replaced the exploded bulbs and the various newly burnt out ones, with old working ones. After getting everything back together I tried again. Success, illumination and no explosions!
All of the above happened while I was working on the breaks and the power steering pump. Once I started driving the car, a few things became apparent. First I really wanted a boost gauge in order to know what the turbo was doing. The boost gauge is a digital readout, provided by the non-functional center LCD. Second, the check engine light worked, I know because it would light up every time I accelerated. Third, by some miracle, the odometer still worked (this is a known weak spot for gauges made by VDO from this era) — at least for 36 miles, when it stopped counting miles.
That the odometer broke wasn’t too surprising or upsetting. There is a set of nylon gears which interfaces between a stepper motor and the gears behind the numbers. The gears simply crack and fall apart due to age. This is such a big problem for every 80’s and 90’s European car with a VDO speedometer, that new gear sets are readily available for a few bucks. I removed the cluster (again) and fully disassembled it. I found no cracks in the gears, which perplexed me. As I opened things up, I was hit the face with a vaguely fishy smell, which is indicative of leaking electrolytic capacitors. Dead/leaking caps can absolutely cause circuitry to just not work, so I took inventory and placed a Digi-Key order. I also ordered a new gear set. I put everything back together and reinstalled it, so I could continue to drive the car.

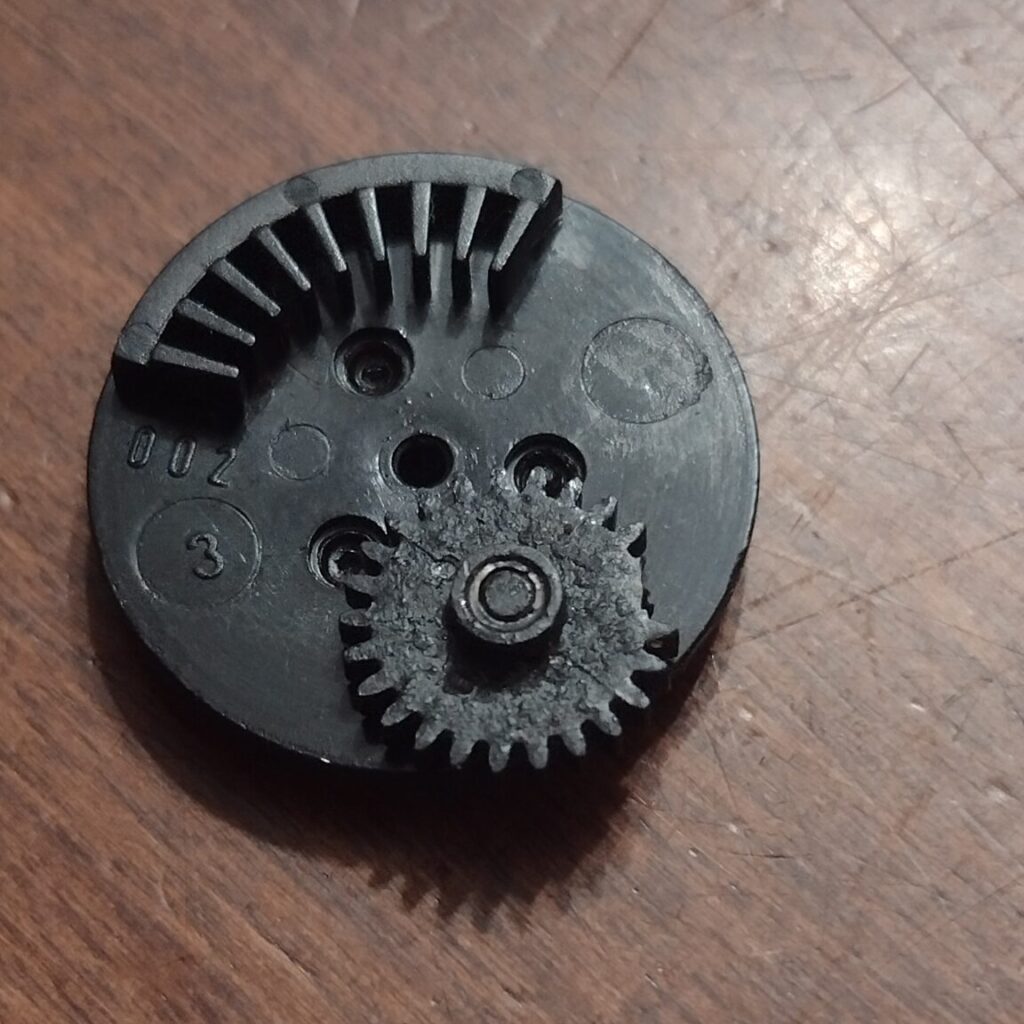
Once all the parts came, I made quick work of the capacitors and the gear replacement. I did find a missing tooth on the old gear, which helped explain the stoppage.
I put it all back together and turned the key on, but I still had no center LCD – at this point I figured it was just a bad LCD panel, and I’d have to source a new one. I started the car and drive down the street. It through clicked 2/10 of a mile and stopped counting again.
So, I took everything apart again and found a small bit of debris in the gear track. With that cleaned out, I figured I’d solved it and put it all back together and reinstall it into the car. 1/10 of mile and it stopped. At this point, I was beyond frustrated and was questioning if an oily rag and a match might be a better solution to this issue. I took everything apart AGAIN and decided to test the circuitry itself on the control board for the speedo/odo. I knew it was getting signal from the speed sensor, as the speedemeter worked without fail.
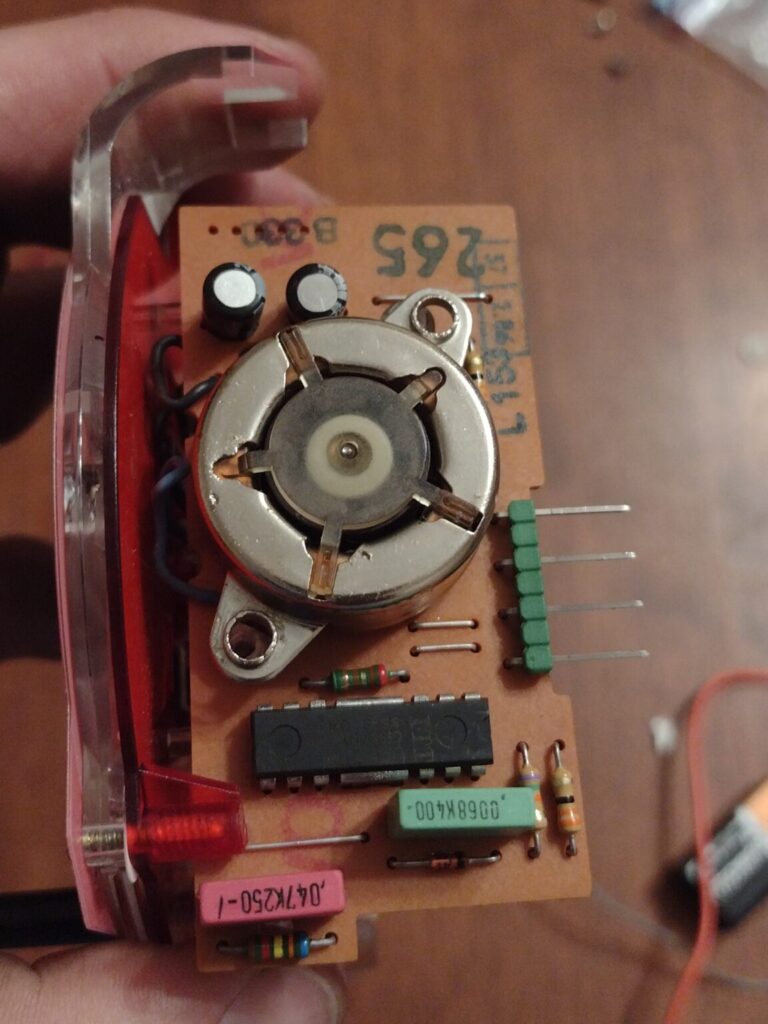
So, on the bench, I simulated input to the board. I measured voltages coming out of the IC chip and everything checked out, the motor was simply not turning when it received voltage. It’s at this point I noted, that the motor, wasn’t sitting flush to the board, a very small amount of wiggling and it popped off the board all together — except the pins which are used to solder the motor to the board, which were still soldered in place on the board.
It turns out, this is possibly one of the worst designs I’ve ever seen. The windings of the motor, which are about as thin as a hair, are soldered to a metal pin, which is held in place with nothing but friction to the plastic housing. The other end of the pin is soldered to the circuit board. That’s it, there is no other mechanical attachment of the motor to the board, so with any movement or manipulation of the board, you risk damaging the connection from the windings to the pins, irreparably damaging it.
I mentioned above that tons of cars with VDO gauges have an issue with the nylon gears. Unfortunately, almost no other car uses this particular motor and control board. It seems only 86-88 Audi 5000 Quattros and similar year Volvo 740s used it. I’m guessing that VDO realized they had a turkey of a design on their hands as all other cars from this era that use VDO gauges seem to have a far more sane motor/board interface.
This also means that it’s incredibly hard to find a replacement. There are no markings on the motor itself, so I needed a donor cluster from one of the above cars. The only thing I was finding on E-bay was a cluster for $450 out of Latvia. Considering the dead center LCD, I needed a donor cluster anyway. But $450 seemed a little too steep, so I kept periodically checking E-bay, hoping for a cheaper option.