

With the rear of the brake system, holding pressure, it was time to attack the front. The rear ended up taking so long to get together, that by this time, I had received the front-hoses in the mail, and made sure that the bleeders on the front calipers were functional, so this should be smooth sailing!
Just to note, replacing the front hoses was not just a precaution, these things were dangerous.
Starting on the passenger side, the old hose came loose from the hardline without too much trouble and unscrewed from the caliper without drama or hesitation. The new hose went in and I felt good. Total time, ten minutes. The first thing that just went according to plan on this car so far!
Then I moved to the drivers side. I won’t give a time estimate on how long the driver’s side took. Note: It’s never a good sign when you have to break out the vice-grips when working on brake lines.
And then it gets worse.
Sigh — it was too good to last. At least we were experts in bending new hard lines at this point. So a trip back to the store, some cutting, flaring and bending, and there is now a new hard line running from the ABS pump to the new hose for the front left wheel. I should note, that this was like a 12 inch line, the pump is just on the other side of the wheel wheel in the engine bay. I thank my lucky stars, that this didn’t happy on the passenger side — I think 1/2 the engine bay would have had to come apart to route the new line.
It was also during this hardline replacement that I became intimately familiar with the difference between a double and a bubble flare on the ends of your tubing. I won’t go into detail here, but you can find some nice pictures and an explanation here: https://www.rtsauto.com/brake-lines-for-bmws-and-e30s-the-bubble-flare-not-the-double-flare/ The Important part of this story, is that if you attempt to put a double flared bit of of tubing (as I had just created), into a fitting that wants for a bubble flare (as does the ABS pump), it’ll never seal and will just squirt fluid everywhere, no matter how hard you tighten the nut. Thankfully, I didn’t just keep cranking on it and figured there must be something wrong, at which point I inspected the end of the old line and had my moment of….Oh, these ends look different. Lesson learned.
With that out of the way, I bled the system out, got a nice firm pedal and felt accomplished for the day.
Note: The following is little out of order from how it happened, but is presented here to keep the brake saga all in one place. The Power Steering Pump Saga took place between the above and the following.
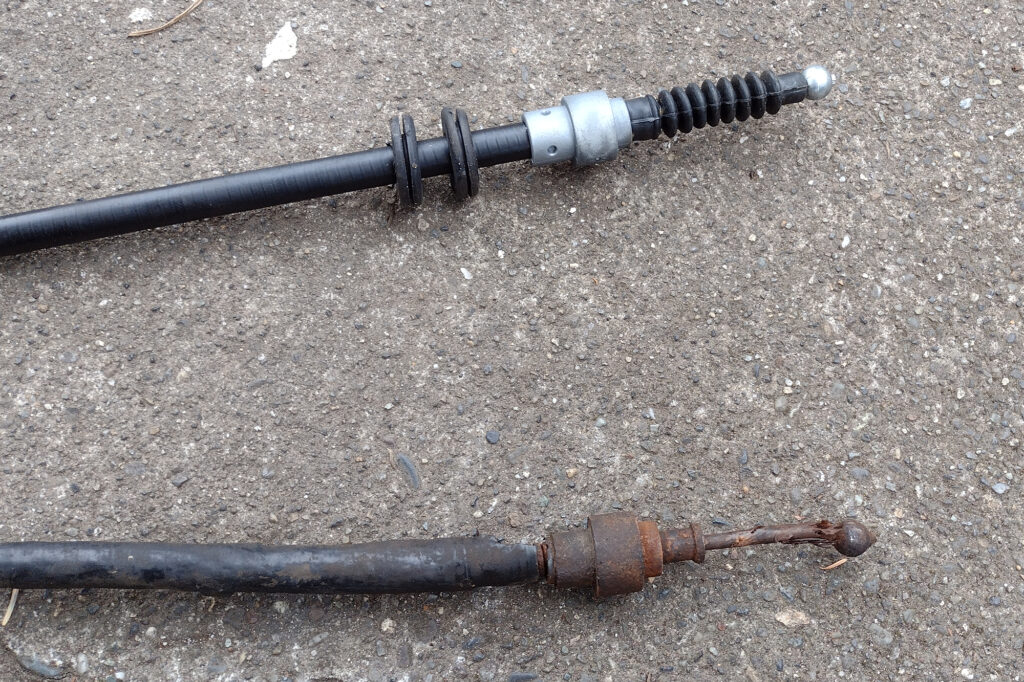
One thing that was extra fun, in moving the car around the driveway before the brake system held pressure, is that that parking brake was also non functional! This was due to bad parking brake cables. The weather proofing in the cables in the car had become compromised some years before. The left side was marginal, the right size was pretty well seized up. By some miracle, I was actually able to find brake new parking brake cables from a specialty parts house.
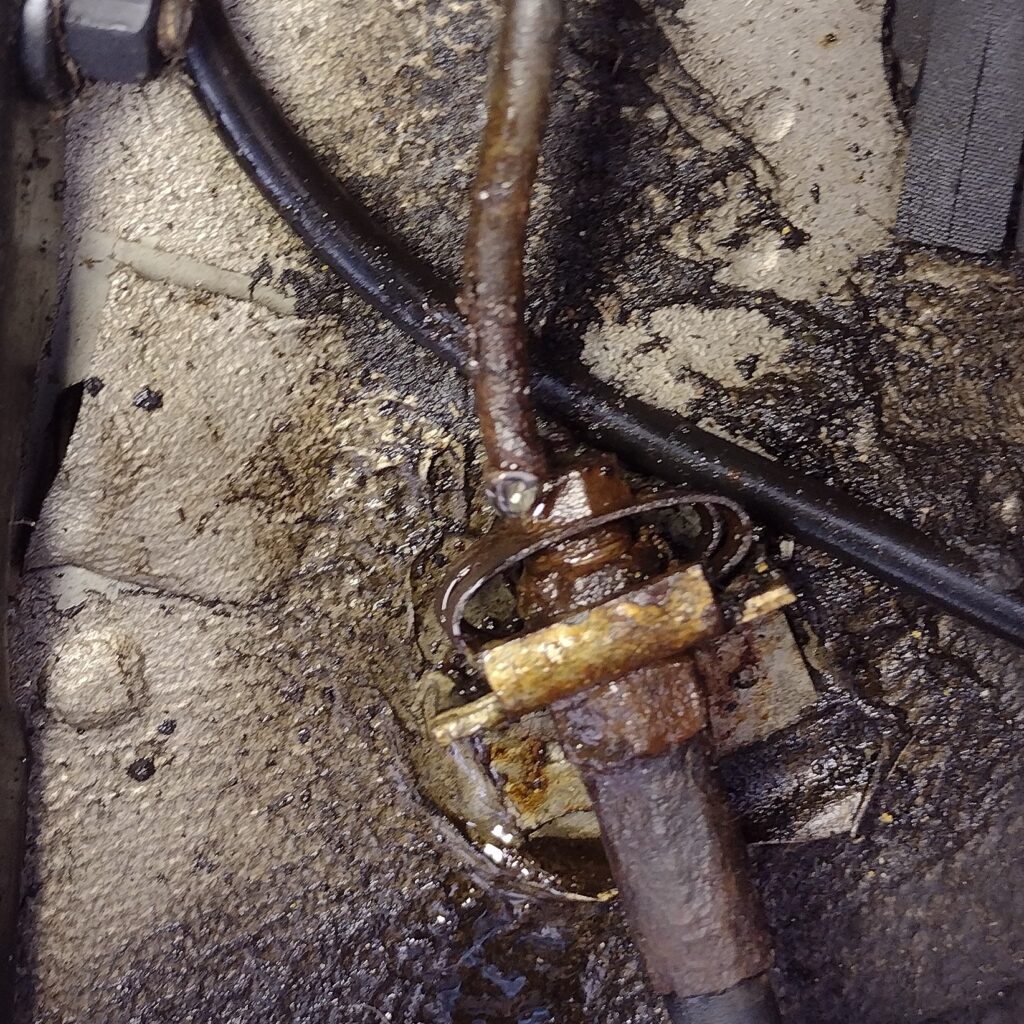
Now, the hardest part of this job, ended up being the fact that the parking brake adjuster is seized up and I couldn’t break it free. I didn’t want to crank on it too hard for fear of snapping it and being in worse shape. Unfortunately, I didn’t think to grab a picture of what’s involved here, but this image from the parts book helps illustrate:
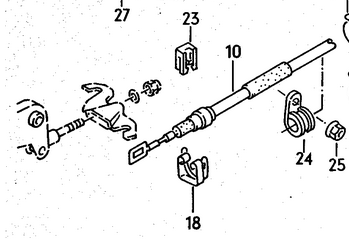
That big wing nut looking thing, is attached to the rod on the backside of the handbrake. The cables simply slip over the hooks. Removal should be a trivial matter of unbolting the bracket (oops, can’t seized, remember?), and sliding the old cable off…which as it turns out, couldn’t really happen either as the bracket itself had swollen with corrosion over the years. However, with enough cursing, grunting and struggling, I eventually persevered and got the old cables off the ears. Removal of the cables from the calipers went smoothly enough. Great, lets put the new cables on.
And here dear reader, is where I almost lost my mind. It turns out that the windows in the ends of the cables, which slide over the ears of the bracket were ever so slightly smaller on the new cables. Maybe if everything were in spec, this would have been fine, but if you recall from above, I had a devil of a time getting the old cables off, due to everything being chunky. So, I got out the file and started cleaning up the ear bracket. Did I mention, it’s still in the car, between the driveshaft and the underside of the tunnel?
For the next hour or so, my life consistent of: file file file, hand cramp, try to fit cable. Rinse and repeat. I eventually got the driver’s side cable to slide on. Looking at the cable for the passenger side, I gave up. The window was even SMALLER and that side of the bracket was even more swollen with corrosion. So I did what I should have done in the first place. I broke out the dremel, and opened up the window in the cable. It took me 45 seconds. Sigh.